Mask creation recipes
Mask creation recipes are a sequence of steps, each applying an algorithm to the elastic image.
The steps can come in any almost any order and can be repeated. At the end of the final step, the illuminated pixels in the mask will be set to a value of 1 so that the final mask can be used as an AND mask to create a point in the HERFD or XES spectra.
Care is taken at the end to remove bad pixels that might have been restored by the Gaussian, polyfill, areal, or social pixel steps.
Recommended steps
Bad and weak pixel removal
The syntax isbad # weak # power #. The first number indicates the value above which a pixel is assumed to be a bad pixel. The second number is the value below which a pixel is considered weak. Both bad and weak pixels are removed from the mask. The third number is the power to which the mask will be raised before continuing with the mask processing. This step happens after the bad and weak pixels are removed. The point of the exponential is to enhance contrast when the elastic scattering is weak.
Gaussian blur
The syntax isgaussian #.#. The number is the threshold value above which illuminated pixels will be retained. This is a simple convolution using the approximation kernel given here. All pixels which fall above the given threshold are set to 1, all pixels below are set to 0. This does a very good job filtering out stray pixels, however it has the negative effect of retaining very bright pixels, such as those from diffraction peaks.
Shield
The syntax is
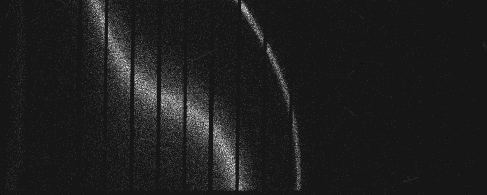
useshield #. The number indicates how far back the trailing image is that will be used to create the shield. Consider an elastic image like this one which contains signal both from the elastic scattering (the thin stripe of the right) and from the onset of the absorption edge (the diffuse signal on the left).The purpose of the shield is to suppress the signal from the onset of the edge, leaving just the elastic bit. Shields are constructed sequentially. The first
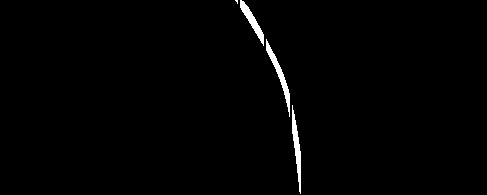
#steps do not have a shield – more specifically, the shield is empty. The next shield uses the mask from#steps prior to block out this signal. The following shield adds the mask from#steps back to the shield of the previous step. Subsequent steps accumulate the masks from#steps back, adding them to their shields.Here is the mask computed from that image:
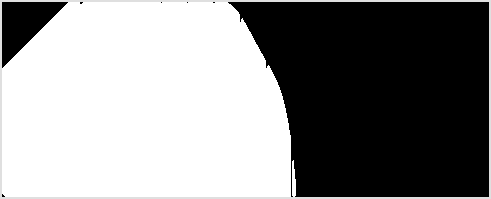
And here is the shield that was used to block the fluorescence signal:
polyfill
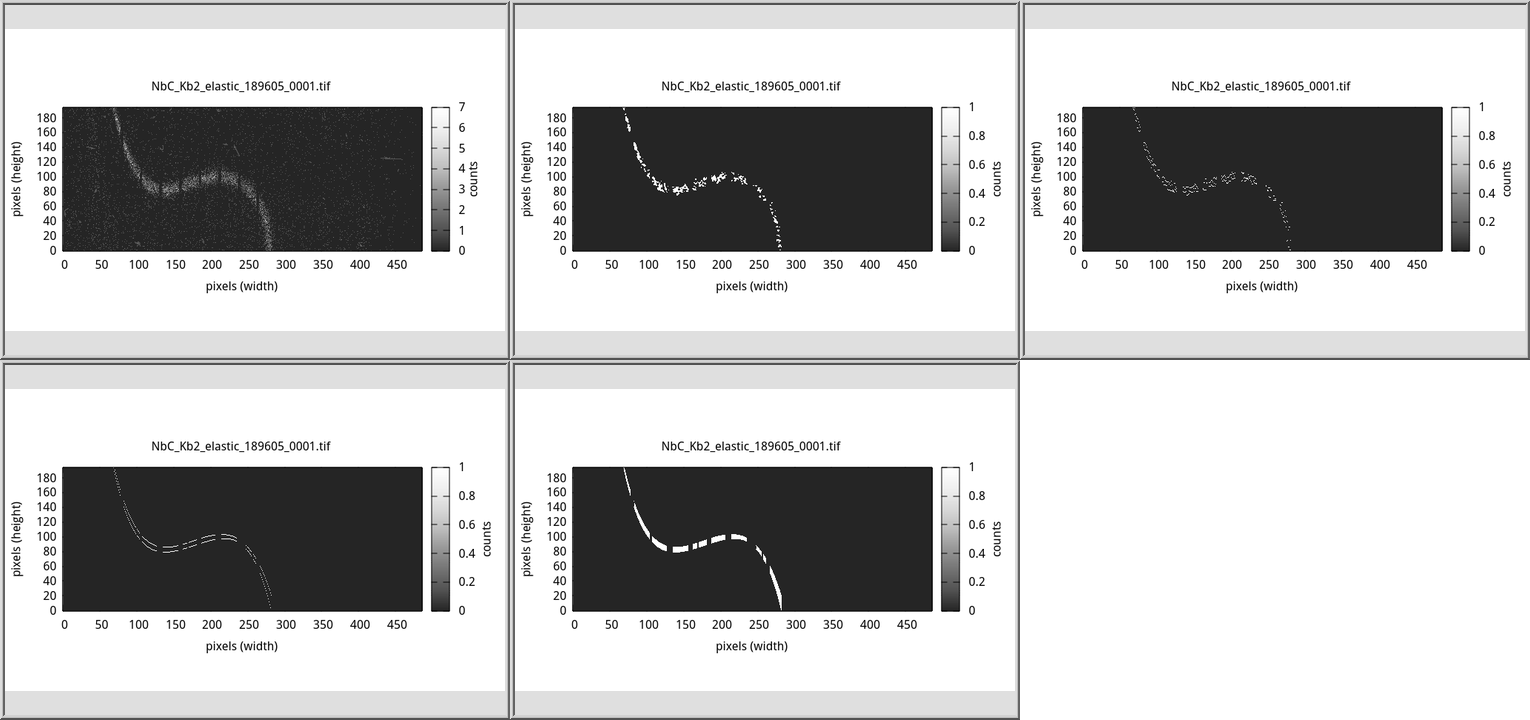
The polyfill algorithm is an attempt to fit a solid figure to the measured elastic scattering. This figure explains the steps:
The first panel is the raw measurement. The second panel follows the Gaussian blur, which removes all of the outlying pixels. The third panel shows the topmost and bottom most pixels in each column after the Gaussian blur. Two polynomials are fit to this collection of points, one to the top set and one to the bottom set. These polynomials are shown in the fourth panel. Finally, the pixels between the two polynomials are turned on, yielding the final mask.
This step should follow the Gaussian blur and useshield steps. It may be necessary to remove spurious points by hand using the
[spots]block in the configuration file. Leaving spurious spots in the image can dramatically affect the polynomial fit.
A recipe using these steps might be:
[steps]
steps = <<END
bad 400 weak 0 power 1
gaussian 1.3
useshield 18
polyfill
END
Other steps
These are mostly things that I implemented in earlier stages of development. I find the Gaussian blur works better than the lonely and social steps and the areal mean. But all of these are still there for testing purposes.
Multiply
Multiply emission image by an overall constant. The syntax ismultiply by #where the number is the constant scaling factor.
Areal mean or median
Apply an areal median or mean to each pixel. The syntax is
areal (median|mean) radius #. The number defines the size of the square considered around each pixel. A value of 1 means a 3x3 square, a value of 2 means a 5x5 square. The value of each pixel is set to either the mean or the median value of the pixels in the square.The median is not implemented at this time.
Lonely pixels
Remove all the lonely pixels. A lonely pixel is one which is illuminated but is not surrounded by enough illuminated pixels. The syntax islonely #. The number defines how many illuminated pixels are required for a pixel not to be considered lonely.
Social pixels
Include all social pixels. A social pixel is one which is not illuminated but is surrounded by enough illuminated pixels. The syntax issocial #. The number defines how many of the surrounding pixels must be illuminated for the pixel to be turned on.
A recipe using these might be:
[steps]
steps = <<END
bad 400 weak 2 power 1
lonely 3
social 2
END
Development tools
Energy map
Use the energy map computed by the
maptask. The syntax ismap #where the number is the width in eV about the emission energy. Any pixels with a value of<emission> +/- <width>will be included in the mask. Note that it makes no sense to use this step with any step other than the bad/weak step, which should precede this step.This is not working at present.
Entire image
Use the entire image. The syntax isentire image. This step just sets all the pixels in the mask to 1 so that the entire image is used to compute the energy point. Note that it makes no sense to use this step with any step other than the bad/weak step, which should precede this step.
Xray::BLA and METIS are copyright © 2011-2014, 2016 Bruce Ravel and Jeremy Kropf – This document is copyright © 2016 Bruce Ravel
This document is licensed under The Creative Commons Attribution-ShareAlike License.
If this software and its documentation are useful to you, please consider supporting The Creative Commons.
