Using the group list
The group list is the primary mechanism for accessing and interacting
with your data. As data files are imported in ATHENA, each gets
an entry in the group list. Data generated during the course of using
ATHENA, such as copied or merged groups, also get placed in the
group list.
Each group list entry consists of two parts, the label and the check
button. The label contains text identifying the group. The default
is for the label to be the same as the file name. Clicking with the
left mouse button on a label makes that group the
current group.
The current group's label is highlighted with a light red color and
its parameters are displayed in the main window. The current group is
the one that gets plotted when the red plotting buttons are pressed.
The check button is used to mark the group. Marking, explained in
detail in the next section,
is one of the fundamental user interface features in ATHENA.
Any feature of ATHENA that involves more than one group uses the
mark buttons.
File can be dragged from your computers file manager (e.g. Windows
File Explorer, KDE Dolphin, or GNOME Nautilus) and dropped onto the
group list. These files, which can be data or project files will be appended
to the group list. You cannot drop folders onto the group list.
Copying groups
You can copy a group by hitting
Shift-y
or by selecting “Copy group” from the Group
menu. This makes an identical copy of the current group and places it
at the end of the groups list. All parameters are identical and the
data arrays in IFEFFIT are all copied -- only the IFEFFIT
group name in different.
Copying is very useful for examining how changes in parameter values
propagate through the data processing. You can make one or more
copies, change particular data values, and overplot the results.
The process of comparing parameter values can be automated using the
copy series tool.
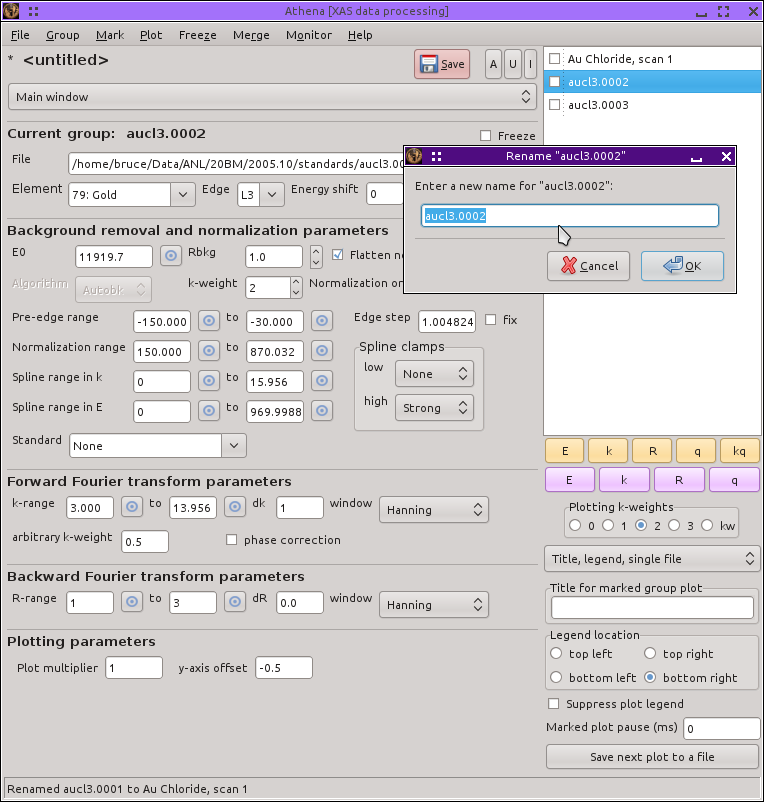
Reorganizing the group list
When a file is imported into ATHENA, the name of the file is
used as the label in the group list. That's fine, but you can change
the label by selecting “Rename group”
from the Group menu, typing
Shift-l, or double clicking on
an item in the group list. This posts a dialog
for entering the new label for the group, shown
here.
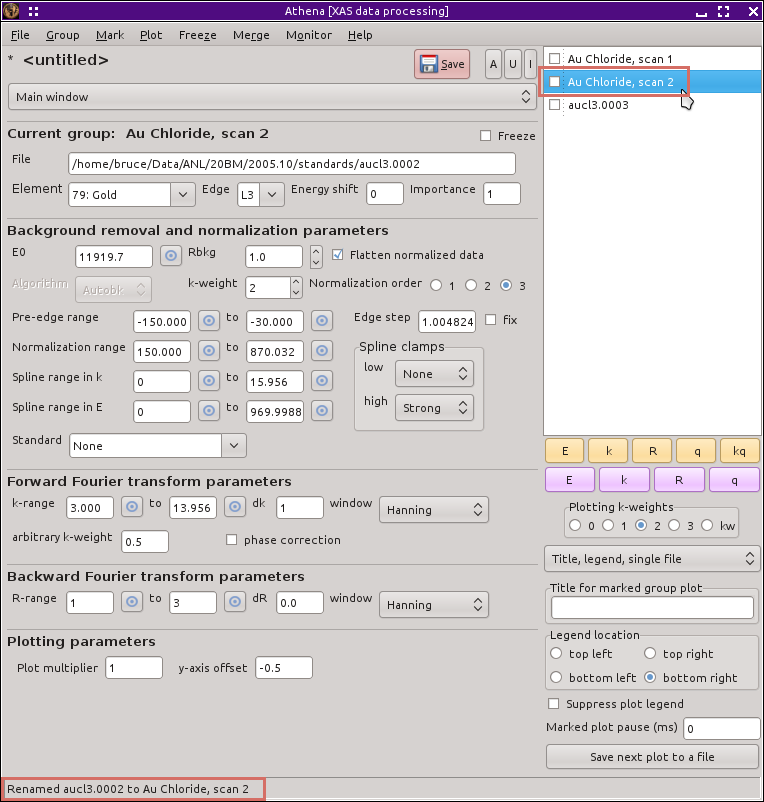
Hitting Return or clicking the OK button
renames the group, shown
here.
We have already seen
how groups can be copied. Making one or more copies is an excellent
tool for exploring the effects of the various parameters in the main
window.
There are several other useful tools for modifying the contents of the
group list. You can reorder the items in the groups list using
Alt-k or
Alt-j
to move the current group up or down in the list.
Hitting
Control-k or
Control-j changes the current
group to the one above or below.
 As of version 0.9.20, Control-drag-and-drop
is no longer available for reorganizing group list items. That
feature has been discontinued in favor of file drag and drop.
As of version 0.9.20, Control-drag-and-drop
is no longer available for reorganizing group list items. That
feature has been discontinued in favor of file drag and drop.
Items can be removed from the list. The current group or the marked
groups can be removed from the project by selecting
“Remove group” or
“Remove marked groups”
from the Group menu. You can remove all the
groups from the list by selecting
“Close project” from the File or
Group menu or by hitting Control-w.
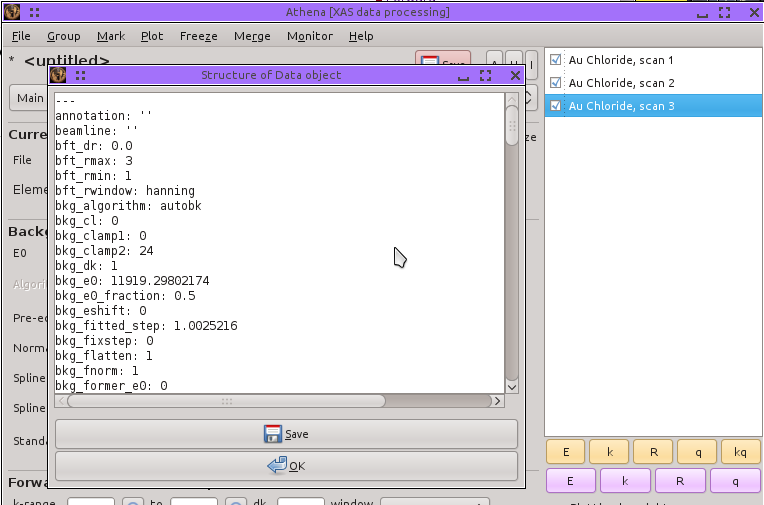
Information about items in the group list
In the Group menu, the option for “Show
structure of current group” displays
the dialog shown
here.
This presents all of the parameter values of the current group as well
as the contents of the data arrays associated with the group. This
way of presenting the information is, admittedly, rather cryptic. But
it is very useful for developing and debugging the software.
 If you mistakenly import a data group as the wrong record type, you
can change it by selecting
“Change record type” from the Group menu.
You can only change between the various record types in energy,
though. If you import a χ(k) file as μ(E) by accident, you will have to
remove the group and re-import it.
If you mistakenly import a data group as the wrong record type, you
can change it by selecting
“Change record type” from the Group menu.
You can only change between the various record types in energy,
though. If you import a χ(k) file as μ(E) by accident, you will have to
remove the group and re-import it.
As of version 0.9.19, there is a label on the main window displaying
the data type. You can toggle between μ(E) and XANES data by
Control-Shift left clicking on
that label.
Using the mouse in the group list
You can turn on automated replotting when you select a new group by
clicking on it in the group list. This is done by
setting ♦Athena → select_replot
with the
preferences tool.
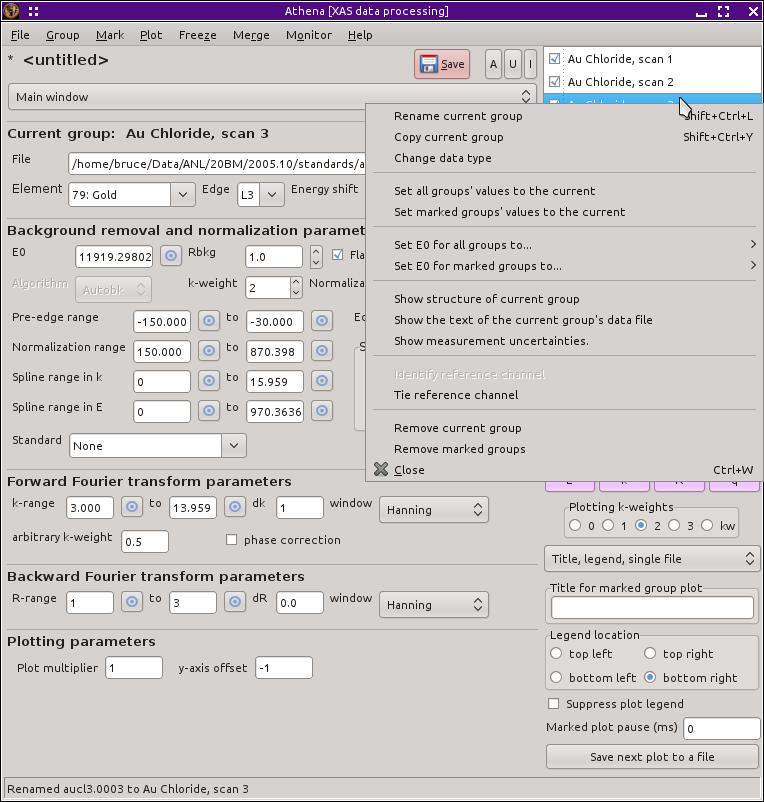
If you right click on any item in the group list, a context menu is
posted, as shown
below,
displaying the Group menu.
As mentioned above, double clicking on a group list item will post the
dialog for renaming that group.
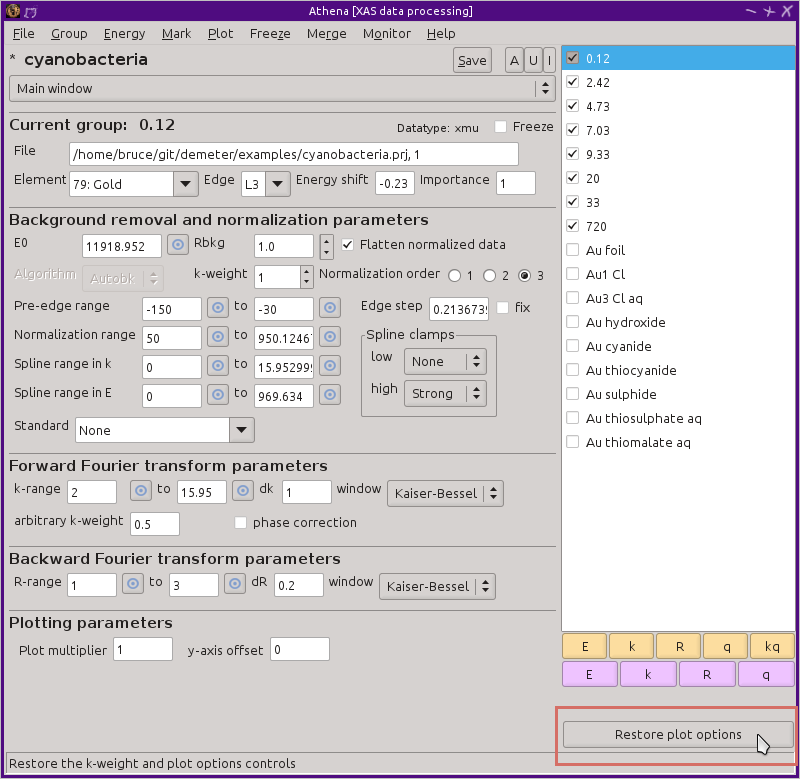
Shrinking and expanding the group list
The last item in the plotting options tabs, labeled “Shrink”, causes the k-weight buttons and plot options
tabs to be hidden, causing the group list to expand, and allowing the
display of more data groups. When the plot options tabs is shrunk, it
is replaced by a button labeled “Restore plot
options”. Clicking this will return the k-weight buttons and the
group list to their original places and the group list to its original
original size.
| ![[Athena logo]](../../images/pallas_athene_thumb.jpg)