8.1. Using the plot list
The contents of the plotting list are included in a plot made from the Plot window. There are a number of ways of populating the plotting list manually and there are tools for repopulating the list upon completion of a fit.
8.1.1. Populating the plotting list manually
The most basic way of moving a data set or a path to the plotting list
is to click on a plot transfer button. These are the light blue
buttons –  – at the top of the Data
window. There is one to the left of the name of the data set. Clicking
on this button inserts that data at the end of the plotting
list. There is also a transfer button on each Path page to the left of
the path's name.
– at the top of the Data
window. There is one to the left of the name of the data set. Clicking
on this button inserts that data at the end of the plotting
list. There is also a transfer button on each Path page to the left of
the path's name.

Fig. 8.1 The plot transfer buttons on the Data window and Path page
Clicking on any of the path transfer buttons inserts that path at the end of the plotting list.
In this way, the plotting list can be built up item by item. The order in which items are inserted into the plotting list is the order in which they are displayed in the plot. An item can be removed from a plot without removing it from the plotting list by unchecking its check box.
Of course, adding a number of paths to the plotting list by checking on their individual transfer buttons can be quite tedious. Transfering of items into the plotting list is another of the many chores that use the set of marked paths. Marking a path is done is by checking its check box in the Path list or by using one of the handy options in the Marks menu. Once a set of paths is marked, selecting will move that set in order to the end of the plotting list. By learning to use path marks effectively, you can quickly build interesting plots which include data along with many paths. Note that keyboard shortcuts exist for everything in the Mark and Actions menus. These are shown in the menus themselves. Learning these shortcuts makes setting up interesting plots much faster and easier.
The Clear button at the bottom of the Plot window is used to remove all content from the plotting list.
Items in the list can be reordered by  dragging and
dropping while holding down the control key. Note that an item will be
placed after the item on which it is dropped.
dragging and
dropping while holding down the control key. Note that an item will be
placed after the item on which it is dropped.
 Right clicking on an item will post a pop-up
button for removing that item from the list. Selecting more than one
path then right clicking will post a menu with
options for removing the selected paths or for altering their check
buttons.
Right clicking on an item will post a pop-up
button for removing that item from the list. Selecting more than one
path then right clicking will post a menu with
options for removing the selected paths or for altering their check
buttons.
8.1.2. Refreshing the plotting list after a fit
After a fit finishes, the plotting list will be populated with all of the data sets and paths which have their Plot after fit button checked. On the Data window, this checkbutton is found in the Other parameters section at the bottom of the page. On the Path page, this checkbutton is directly below the name of the path at the top of the page.
Upon completion of the fit, the plotting list is cleared the repopulated with all the items selected for plotting after the fit. The data are inserted in the order they appear in the Data sets list in the Main window. Paths associated with that data set are inserted after their data set in the order they appear in that data set's path list.
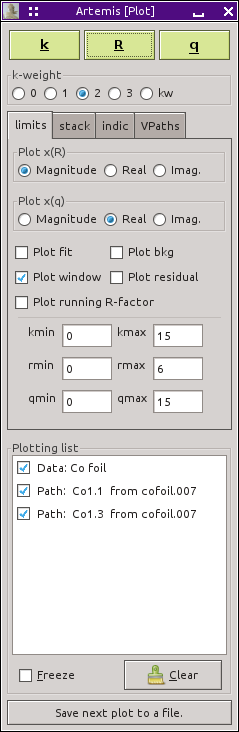
The refreshing of the plotting list can be turned off by checking the Freeze button below the plotting list. This will preserve the state of the plotting list as it appeared before starting the fit.
8.1.3. Plotting a sum of paths without performing a fit
There are several ways to do this, but the easiest is to select on the Data page. This will create a VPath out of all the paths included in the fitting model for the data. The VPath will be placed in the plotting list in the Plot window and the plot will be made in R. You can then plot in other spaces using the plotting buttons.
DEMETER is copyright © 2009-2016 Bruce Ravel – This document is copyright © 2016 Bruce Ravel
This document is licensed under The Creative Commons Attribution-ShareAlike License.
If DEMETER and this document are useful to you, please consider supporting The Creative Commons.